
Welcome to PiQ! This guide will lead you through the initial setup of your PiQ Process Management System. Please follow this guide step-by-step to assure that your application is set up correctly.
Let’s Get Started!
First, go to your private instance of PiQ and login using the credentials you were given at sign-up.
After you have successfully logged in, you will land on the Dashboard. Use the tabs to navigate through this tutorial.
Step 1: Your Information
We need to add you as an employee in the system.
- First, select the Admin tab.
- Next, select the Employees subtab.
- You should see a table like the image below.
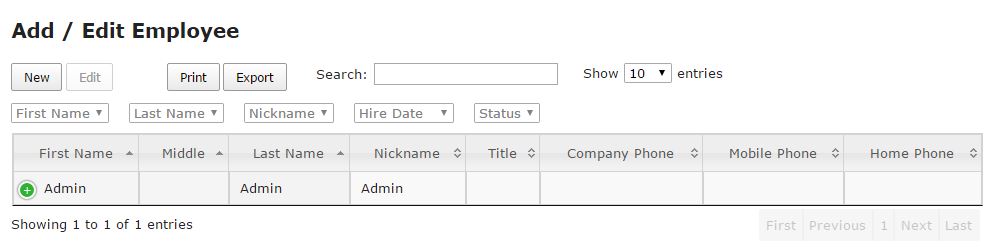
- In the Employees table, there is a placeholder name for you to edit (Admin / Admin)
- Click on that row to highlight it, and you’ll note that the Edit button becomes active. Click the Edit button.
- The Edit Entry form will appear as shown below.
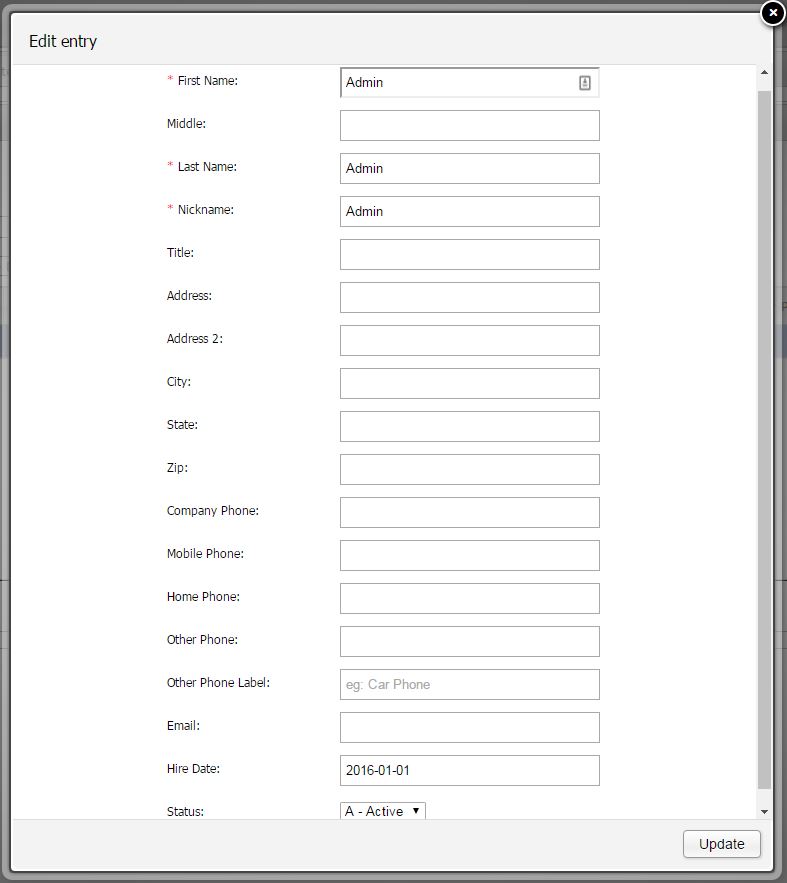
Note that all of this contact information is your personal (home) address and info, as your employee record in the company.
- First Name: (Required.) Replace “Admin” with your first name.
- Middle: A middle name or initial may be entered here.
- Last Name: (Required.) Replace “Admin” with your last name.
- Nickname: (Required.) This will be the display name used in PiQ when referencing this person.
- Title: Your title within the company.
- The rest of the information is self-explanatory.
- When you are done entering your information, click “Update” to complete the record. You are now the first employee in your PiQ system!
Step 2: Your user account
Click on the Users tab.
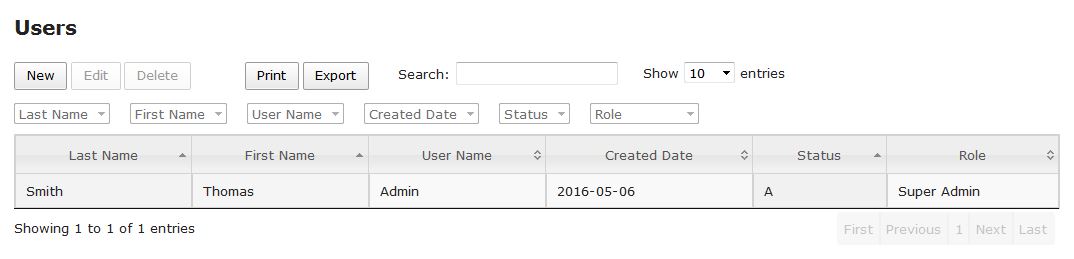
You see your entry as the first PiQ User. Click on the row with your name in it and then click the Edit button. A form appears as follows: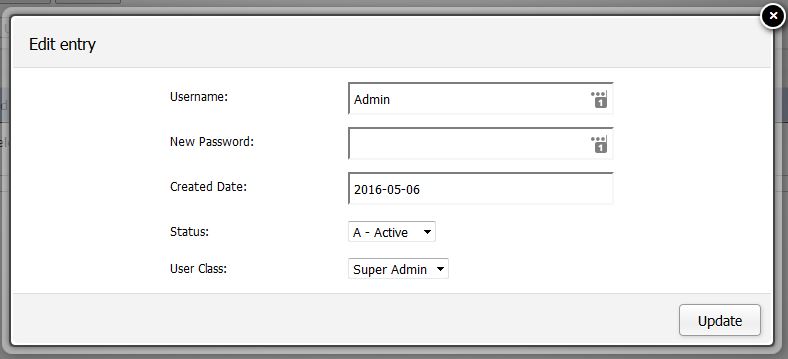
- Username: You can continue to use Admin as your username, or change it to whatever you would like.
- New Password: Create a new password that you will remember.
- Created Date: The date the employee was granted a PiQ username. Set to today’s date.
- Status: Leave as Active.
- User Class: Your User Class is “Super Admin.” The Super Admin has access to everything within PiQ. Every account needs at least one Super Admin, so leave this as-is.
Click Update, and your new user information is established. It’s a good time to sign out and sign back in using your new User Name and Password, although it is not necessary at this moment.
The next time you sign in, however, you will need your new credentials as the old ones will no longer be valid. Write them down now so you don’t forget.
Step 3: Your Company Information
Click on the Setup tab (subtab of Admin) to configure PiQ to your Company. There are several tables we’ll be updating on this page.
![]()
Select the time zone in which your company is located.

Company Info
This is where you will input the information for your company. Click on the “Your Company” placeholder row and click Edit.
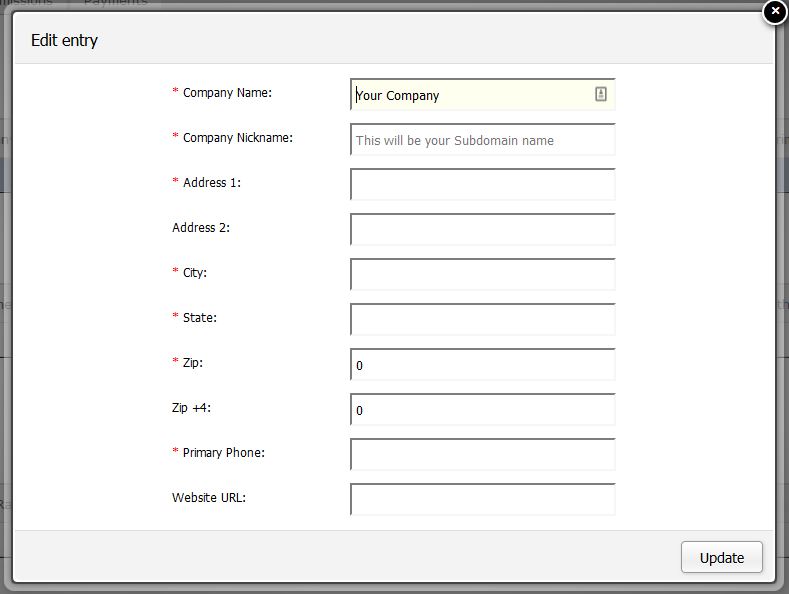
- Company Name: (required) Replace “Your Company” with your company name.
- Company Nickname: (required) Your Company Nickname will be used as your subdomain name for accessing PiQ. It must contain only letters, numbers, and dashes (-) with no spaces. For example, if you choose TomsParts as your nickname, your URL will be https://tomsparts.piqpm.com
- The rest of the information is self-explanatory. Enter the contact information for your company.
 The Contacts table is what PiQ uses to contact your company if there are any issues we need to resolve. Your information is already listed as the Account Owner. Later, after you have added more employees to the system, you can also add them to this list of contacts.

The SIC Codes table helps PiQ understand the requirements of your business. Please take a moment to select at least one SIC code for your company.
- To create an SIC Code, first enter a ranking (1 for primary, 2 for secondary, etc…) and then use the select dropdowns to choose your industry.
- SIC Codes may be edited or deleted.
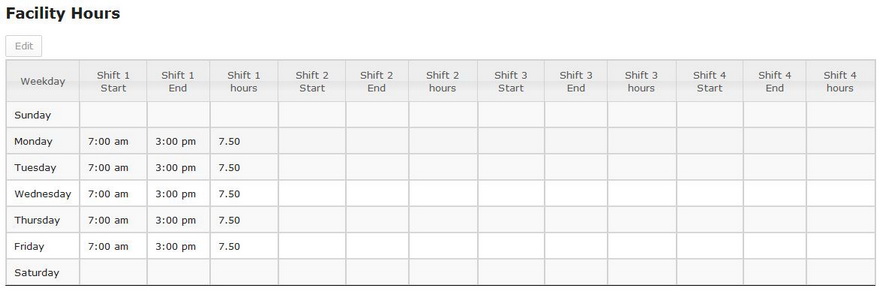
The Facility Hours table is used to establish the hours of production that your company maintains. These numbers drive your utilization graphs and factor into productivity calculations throughout PiQ.
- Set up your Production Hours by clicking on each day you are producing.
- If your production hours are the same for multiple days, you may hold down your shift key and select multiple days at once, and enter the production hours once.
- Enter the start and end times for all shifts, then enter the number of hours produced on each shift. Example: If you have 8 hour shifts, but they are not producing for 30 minutes, enter 7.5 hours.
- Production hours can be edited if your days or shifts change.

The Holidays table is used to establish the dates that your company will observe holidays. These dates will be factored out of your available production days in calculating utilization and lead times.
It is important to remember that If holidays are not entered, PiQ will consider them production days.
- For each holiday you observe, create a new record and the number of hours that will be worked on each shift on that date.
- It’s a good idea to enter all holidays that will be observed at the beginning of the year.
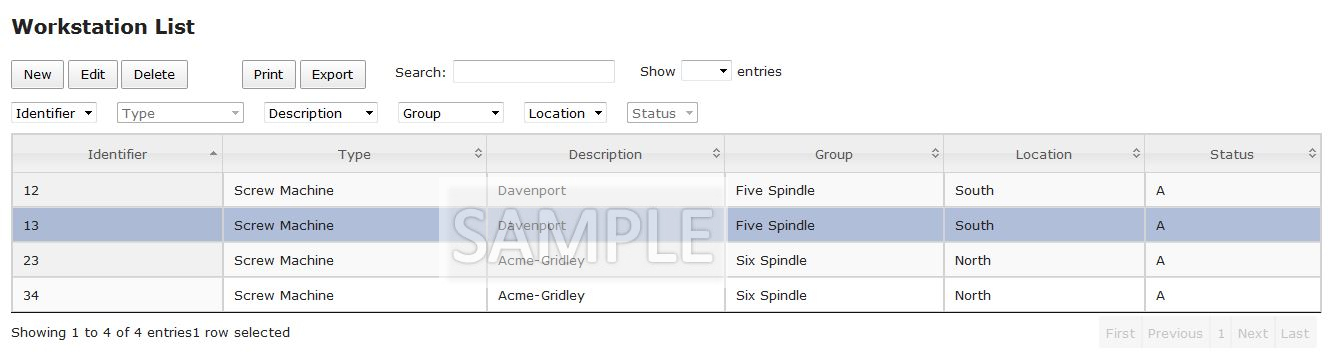
The Workstation List is the list of all machines or producing units in your company. Each part in manufacture will be mapped to the workstation(s) producing it.
Click the New button for each workstation you want to add to PiQ. In the form, you’ll enter the following details:
- Indentifier: The number, code, or word you use to designate this workstation
- Type: The word you would use to identify this type of workstation.
- Description: Any text you would like to used to describe this workstation.
- Group: A classification you may use to put this workstation in a group.
- Location: A term you use to designate the physical location of this workstation.
- Status: “A” = Active, “I” = Inactive. You can move a workstation to Inactive status if it is removed from your facility, or expected to be out of service for a long time period.
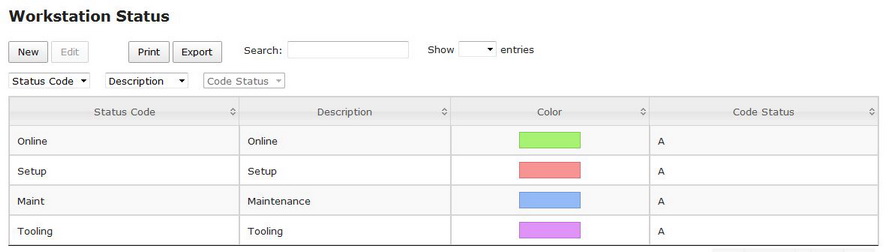
The Workstation Status table is the list of all of the status codes you designate for your Workstation Monitoring system.
If you wish to set up Workstation Monitoring later, you can come back to this step later.
By default, your first status (Online) is already set up with a green color. This designates that a machine is currently producing.
Add status codes that are relevant to your workstations by clicking the New button. In the form, you’ll enter the following details:
- Status Code; A shortened version of the status name, limited to 8 characters.
- Description: The full name of this status
- Color: Use the colorpicker tool to select the color that you wish this status to display.
- Code Status: Leave as Active as long as this status code is relative to your operations.
That’s it! Your PiQ is now configured and ready to use. Next, follow the Set up Your First Part guide to go through the setup for one part that you produce, and you’ll be on your way to full utilization of the system.
