
In this guide, we’ll go through the complete setup for one part in your production system. By the time you’ve completed this guide, you’ll see how PiQ will help you with production and order management. This guide can also be used in the Demo if you’re still evaluating PiQ.
To effectively evaluate PiQ, you’ll want to start with a part that has current open orders, preferably one that you manufacture and sell to one customer with a single delivery location to speed data entry. If this is not applicable, choose one with the fewest customers / locations to speed data entry.
There are several data items that we’ll need to go through this setup, so you may wish to collect all of the information now so you’re ready to enter as we go along. You will need:
- Your internal part number
- An inventory count of all parts on hand (including any that are in quality hold.)
- The maximum parts per hour that can be produced at all workstations currently producing this part.
- The daily production total for each of the last five days.
- The amount of material on hand that has been allocated to the production of this part. We’ll actually need the number of parts that can be produced from the material on hand, so do those calculations and have that number ready.
- Customer name
- Customer location
- Customer part number
- A list of open orders for the part (if there are many, starting with the first 3 or so will be sufficient.)
Create a Part
Let’s begin with the Part Master. Go to the Parts Tab, Part Master Subtab. Your table should look like this, although it will have no data.

Click on the New button to add your first part. A form will appear:
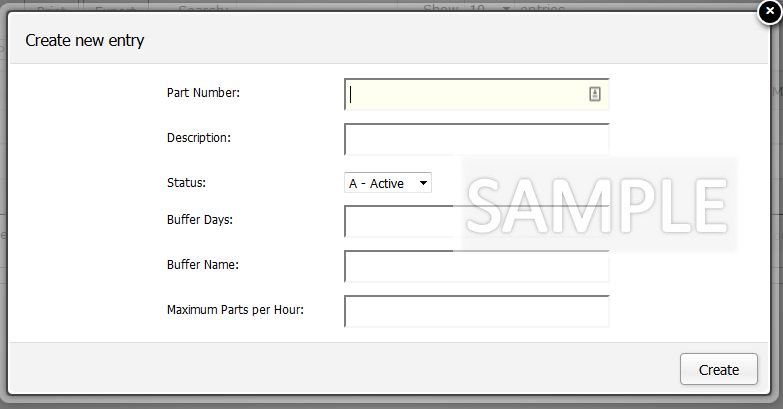
Enter the following data:
- Part Number: Enter your Internal Part Number for this part.
- Part Description: Enter a brief description of the part.
- Part Status: Set the new part to Active status.
- Buffer Days: Add any number of days you wish to place between completion of production and the Order Due Date.
- By default, PiQ’s “Work Days Remaining” schedules you to complete production the day before the order is due, and the day count does not count today.
- A standard Buffer Days number would account for how much time you need to pack and ship the order so it arrives on the Order Due Date.
- Another Buffer Days example: Let’s say you need to send parts out for secondary operations after you have completed production. If the secondary operation requires 5 days at your supplier, add 5 buffer days to your pack & ship days. This will assure that you have completed your production in time to get the parts through secondary operations before shipping.
- Buffer Name: Enter a brief description to describe the added Buffer Days.
- Max Parts per Hour: Enter the number of parts that can be produced per hour when all workstations currently dedicated to this part are producing. This number drives the speedometer graphs on the dashboard when comparing required utilization to current utilization. This number can be changed if you add or remove workstations from production.
Click the Create button, and your part will be added to the Part Master table. We have something to sell, now we need a customer.
Set up a Customer
Go to the Customers Tab. There are three steps to creating a customer.
- Enter the customer’s company name and billing address.
- Create at least one shipping location for the customer where the part will be received.
- Create a Customer Part record for that location that links your part number to the customer’s part number.
Customer Tab:
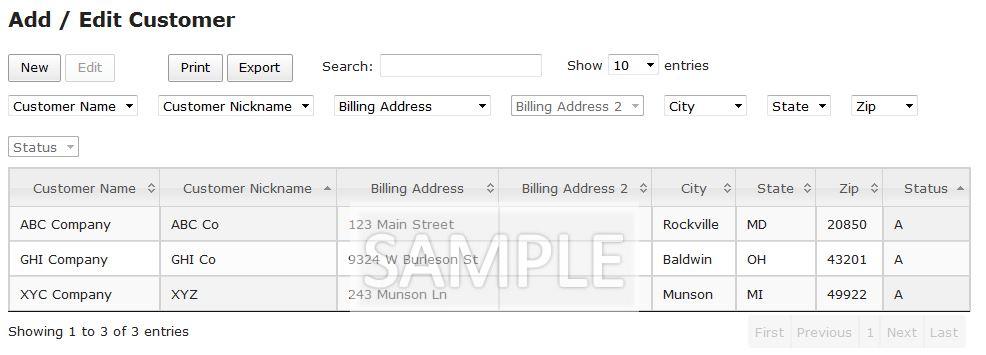
Click the New button to create the customer’s main location.
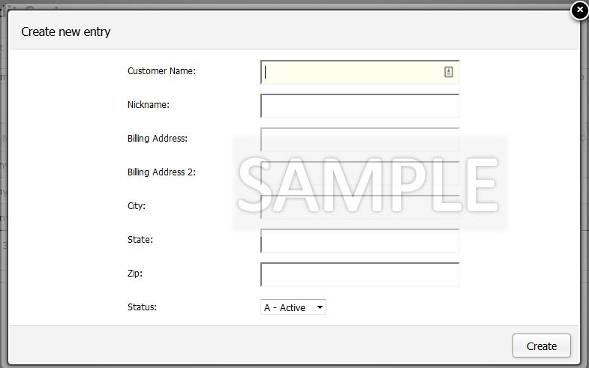
Input the following data:
- Customer Name: Input the full-length name of your Customer.
- Customer Nickname: Enter a shortened version of your Customer’s Name. This is limited to 8 characters, so be concise.
- Billing Address: Enter the address to which invoices will be sent for payment if invoices go to the main location (note that PiQ does not create invoices at this stage, so this is for your information.)
- Billing Address2: Enter any second line of information for the Billing Address.
- City, State, Zip: Enter the remaining address fields for this location.
- Status: New Customers are set to Active by default.
Click Create, and your customer will be added to the table. Now click on the Locations tab.
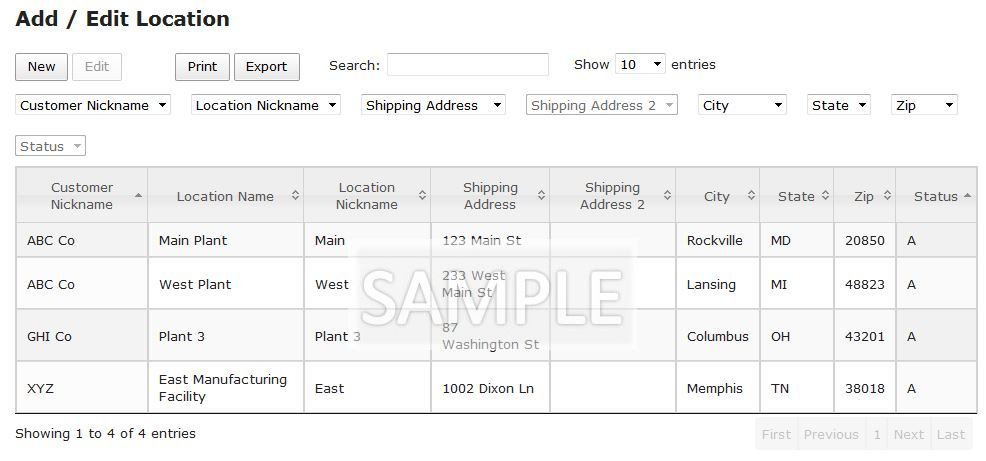
Click the New button to create a shipping location for this customer.
- Customer Nickname: Select the Customer Nickname for the Customer you created in the previous step.
- Location Name: Enter the full-length name for this Customer Location.
- Location Nickname: Enter a shortened version of your Customer’s Location Name. The limit is 8 characters, so be concise.
- Shipping Address: Enter the address to which you will be shipping product.
- Shipping Address2: Enter any second line of information for the Shipping Address.
- City, State, Zip: Enter the remaining address fields for this location.
- Status: Leave the location set to Active.
Click Create to complete the entry of this Customer Location.
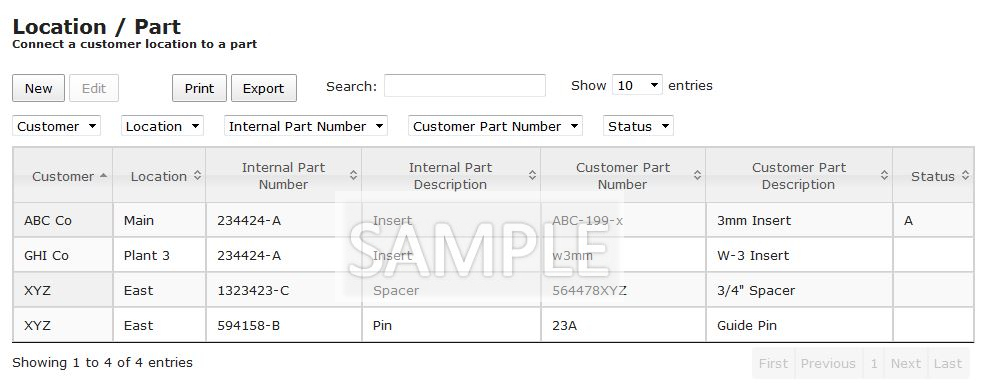
The final step in setting up a customer is to link their location and their part number to your part number. Click on the Location / Part Tab.
Click on the New button, and the form will appear:
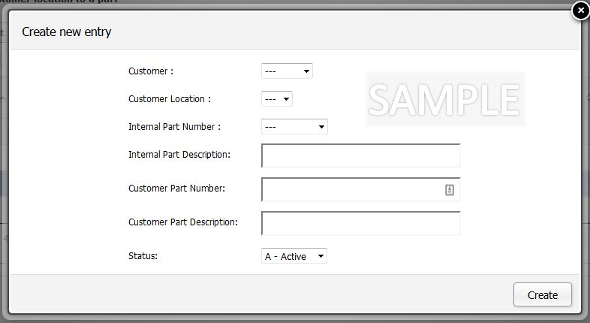
- Customer: Select the Customer Nickname you have assigned to your Customer.
- Location: Select the Nickname you have assigned to this Customer Location.
- Internal Part Number: Select the part number to be shipped to this Customer Location.
- Internal Part Description: This will auto-populate when you select the Internal Part Number.
- Customer Part Number: Input the Part Number used by this Customer Location.
- Customer Part Description: Input the description of the part used by this Customer Location.
- Status: Leave this set to Active.
Click Create to add the Location / Part. We now have a part to sell, a customer that buys it, a location to ship it to, and a customer part number that maps to your part number. Let’s take some orders!
Create Orders
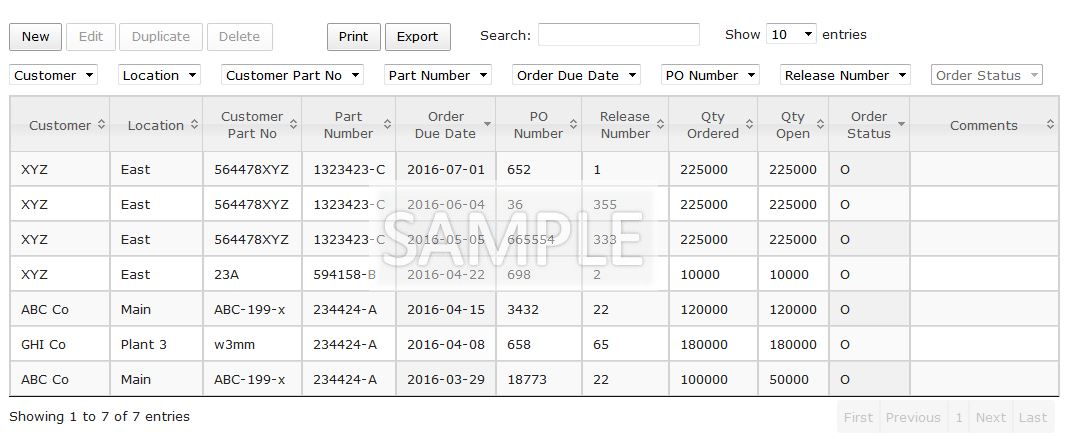
Now we’ll record the open orders for this customer location. Go to the Orders Tab and you’ll see the following table:
Click the New button and the form will appear:
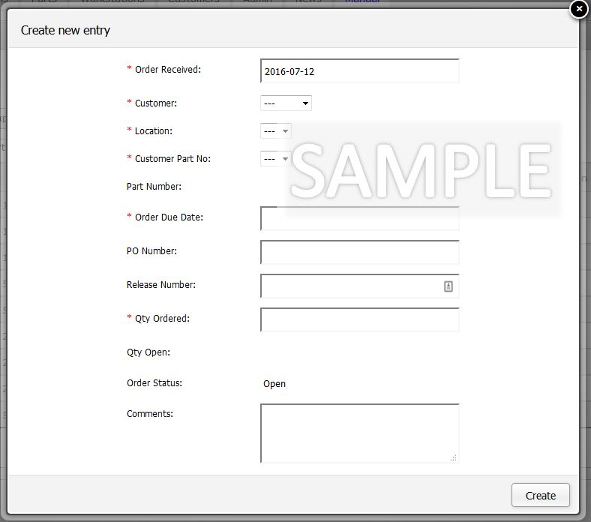
Input the following information for each open order you have for this customer location.
- Order Received: This is the date you received the order from your customer. The date defaults to Today. If you need to change the received date, click on the field and a calendar will pop up to select the date.
- Customer: Select the customer for the order.
- Location: Select the location your customer designated for shipment of this part. If your customer has only one shipping location, this field will auto-populate.
- Customer Part No: Select the part (by your customer’s part number) for this order. If this customer location only orders one part from you, this field will auto-populate.
- Part Number: Automatically displays your part number for this order as confirmation. This field is not editable.
- Order Due Date: The date your customer has designated for delivery. Click on this field and a calendar will pop up to select the date.
- PO Number: The Purchase Order Number your customer has given you for this order.
- Release Number: The Release Number of the Purchase Order Number, when your customer sends you revisions.
- Qty Ordered: The quantity your customer has designated to be shipped on this date.
- Qty Open: This confirms that the quantity open (not filled) is the same as the quantity ordered.
- Order Status: This confirms that the order will be designated as Open. This field is not editable.
- Comments: Any comments you wish to add to this line item can be entered here.
When you are done entering your orders, you can take your first look at the Dashboard for this part.
Dashboard
Click on the Dashboard Tab. Near the Part Select dropdown, you’ll need to hit the Refresh button to make your part appear in the list. Now select your part and you’ll see the orders you have entered. The example below has three orders:

Your Speedometer Graphs will show some information, but they are not yet functional because we have not entered any production data.

And your 30 Days Production graph is empty. So let’s enter some production data!
Production Entry
Go to the Production Tab, and the first subtab is Production. Your table will be empty.
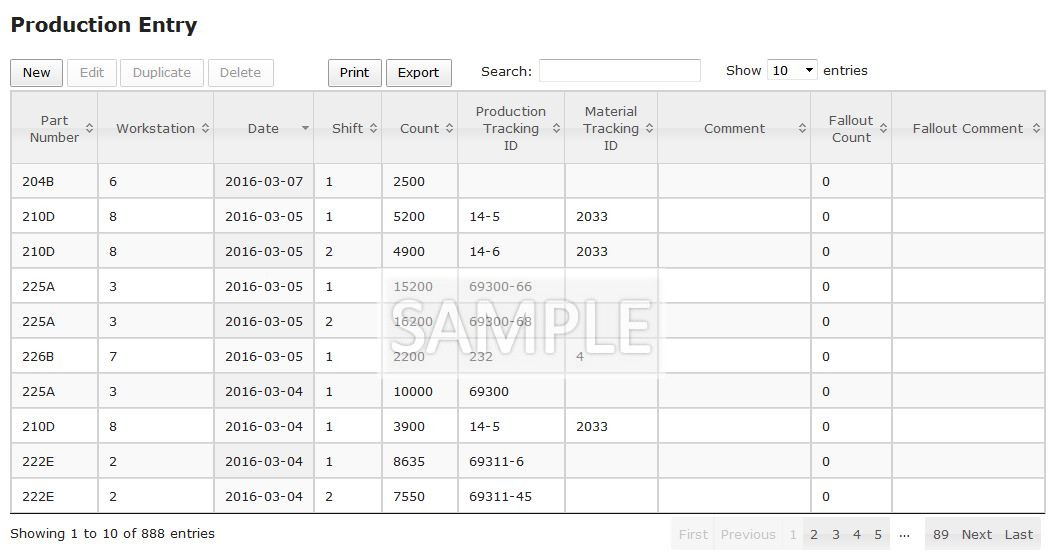
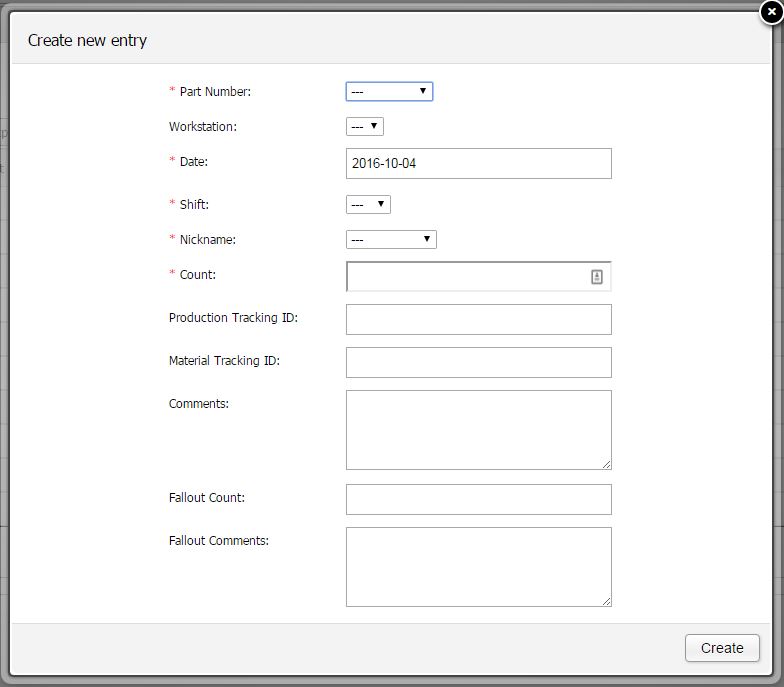
Click on the New tab and we’ll enter the production total for each day.
Note that you can record production for each batch or load, or each shift, or even each individual part if it suits your business model and tracking requirements. PiQ will combine all records into a daily total. Since we’re entering historical data, you can use a daily total for the last five days to get started. If you’re not certain, you can enter an estimate or an average for these first five days.
Since you’re entering five records for the same item, this is a good place to try the Duplicate button. After you’ve entered your first record, highlight the row in the table and click Duplicate to speed entry of the next record. You only need to change the fields that are different for each record.
- Part Number: Select your Internal Part Number from the dropdown list.
- Workstation: Select the Workstation where this production originated.
- Date: Select the date of production.
- Shift: Select the shift of production. Combine all production into one shift if multiple shifts produced on this day.
- Count: Enter the number of parts produced on this day.
- Production Tracking ID: May be skipped since we’re entering a day total.
- Material Tracking ID: May be skipped since we’re entering a day total.
- Comments: Any comments you wish to add to this Production entry may be entered here.
- Fallout Count: May be skipped since we’re entering a day total.
- Fallout Comment: Any comments relative to the Fallout count.
Now that your production data for five days is entered, we’re going to complete the production bar of the dashboard graph by setting your inventory level.
Enter your Inventory Count
Go to the Inventory Audit Tab (subtab of Production.)
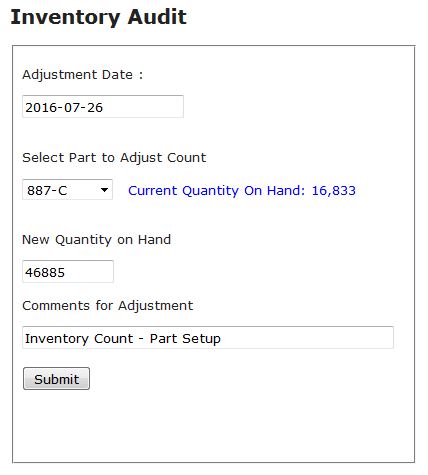
- Adjustment Date: Automatically defaults to today’s date.
- Part Select: Select your part.
- New Quantity on Hand: Enter the total of your inventory count. You’ll note that there is a Current Quantity on Hand due to the five production records you have entered. You do not need to subtract this number from your inventory result, PiQ will do the math. Enter the full inventory count that you prepared for this guide. If there are any parts in quality hold, you will want to include them in this Quantity on Hand. We’ll adjust them later.
- Comments for Adjustment: Enter “Inventory Count – Part Setup” or something along those lines.
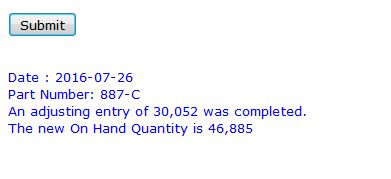
Click the Submit button. Your result screen will show the inventory adjustment that was entered.
Enter any Quality Holds
Did you have any parts on quality hold? If so, let’s go make that entry now. Go to the Quality tab (subtab of Production.)
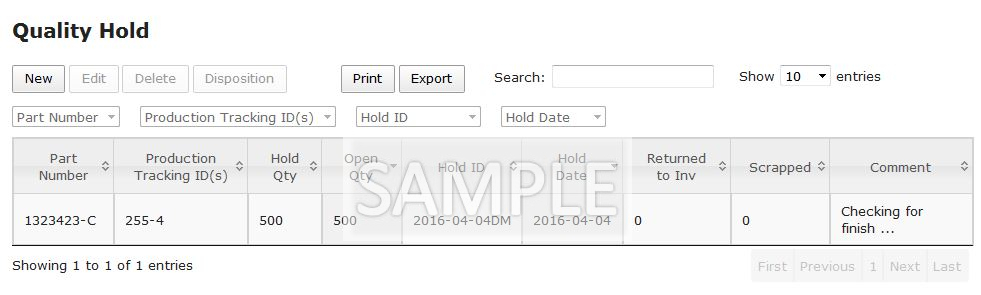
Click the New button and enter your quality hold into the system.
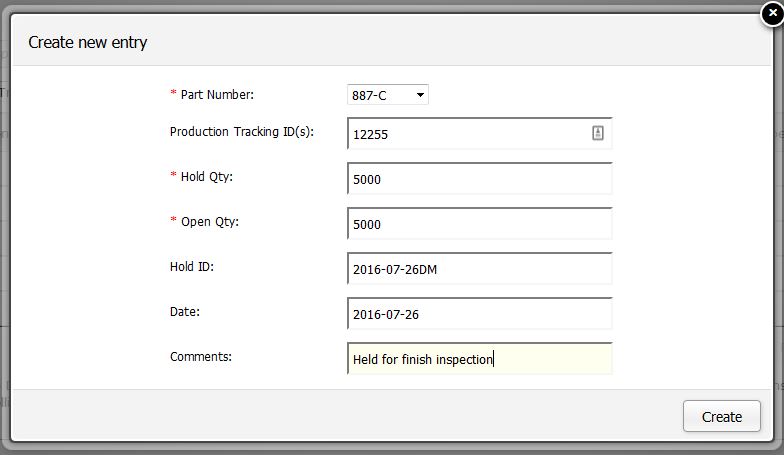
- Part Number: Select the part number to enter a quality hold
- Production Tracking ID(s): A tracking number that designates the run / batch from which the hold originated
- Hold Qty: The number of parts initially put on hold
- Open Qty: The number of parts still on hold awaiting disposition
- Hold ID: An identifier you use to designate the quality hold
- Date: The date the hold was initiated
- Comments: Any comments you would like to attach to the quality hold
Enter Material on Hand
Go to the Materials tab, and look at the Allocate subtab.
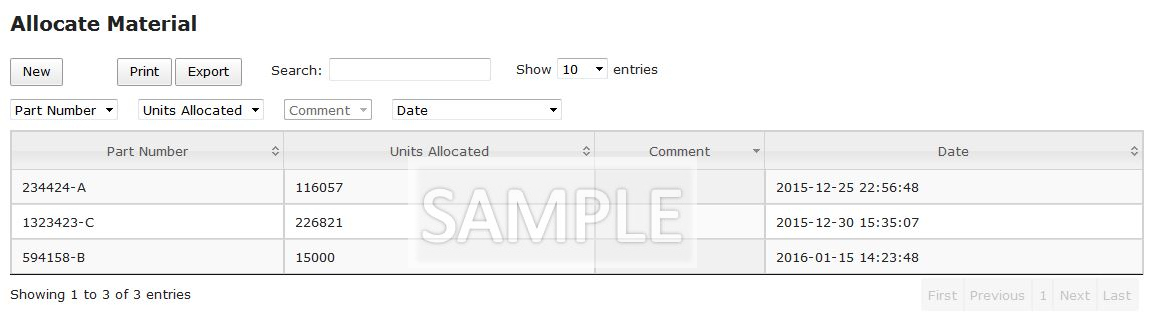
Click the New button and the form will appear:
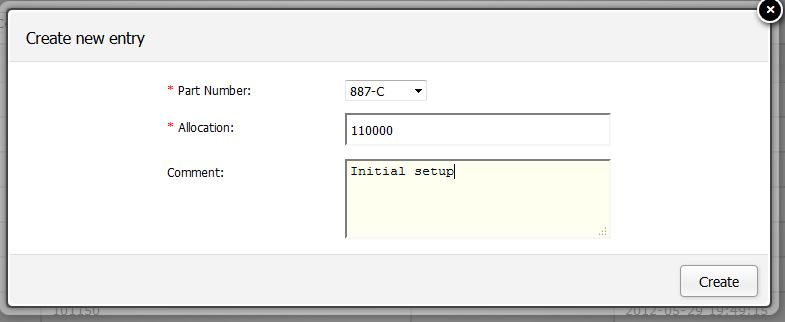
- Part Number: Select the part number.
- Allocation: Since this is initial setup, we’ll also have to account for the material already used to produce the parts you have on hand. Example: You have 41,885 parts on hand, and 5,000 on quality hold. Your material on hand can produce an additional 63,615 parts. Sum them up and enter the total here (110,000 in the example.)
- Comment: Any comments you wish to provide for this Material Allocation.
The Completed Dashboard
We now have the production data needed to drive your speedometer graphs and daily production graph. Let’s go back to the Dashboard and refresh your part.
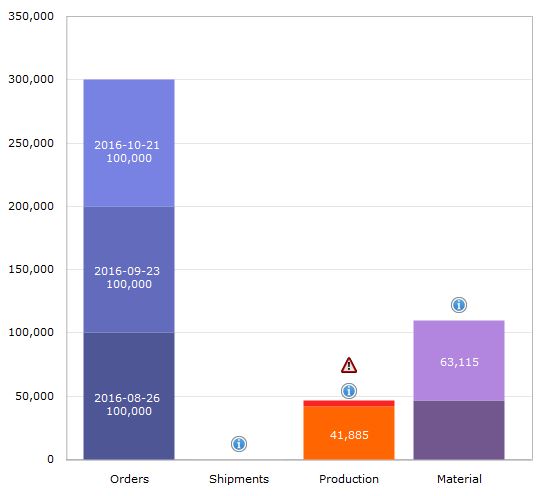
As an overview of this example:
- We have three open orders for the part.
- There are no shipments against these orders as of yet.
- There are 41.885 parts on hand, ready to be shipped. If you look over at the information panel on the lower right, it will tell you the date that this quantity was audited, which helps with your confidence in the on hand quantity.
- There are 5,000 parts in quality hold, indicated by the red bar above the orange on hand quantity. In the live environment, you can mouse over the exclamation symbol and it will tell you the quality hold number – or you can also find it in the information panel at the lower right of your screen.
- There is material on hand to produce another 63,115 parts (enough to complete the first order.) You’ll note that the material already used shows as dark purple.
The Speedometer Graphs are ready to give us vital information about the status of production:
Let’s look at the information supplied:
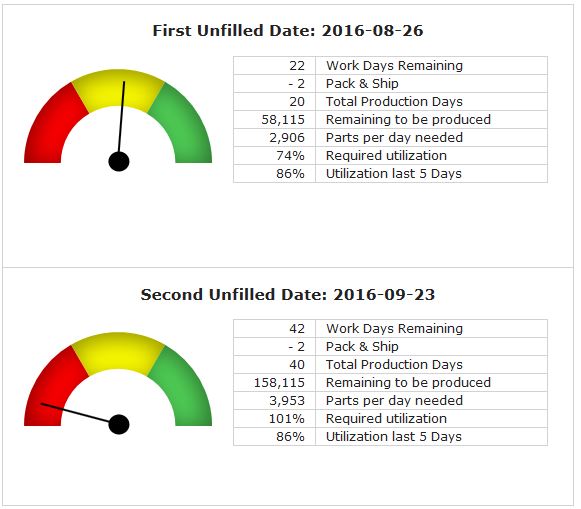
First Unfilled Date
- There are 22 working days remaining, but we have designated 2 days for packing and shipping so we have 20 production days remaining.
- We need to produce another 58,115 parts to complete the first order.
- We need to produce at the rate of about 2,900 parts a day.
- We can see that we’re on track to complete the first order on time if we continue to produce at the rate we have been the last five days.
- Completing this order on time would require that the machines operate at 74% utilization. We’ve been producing at the rate of 86% over the last five days.
Second Unfilled Date
This example highlights an important aspect of PiQ. Even though we’re on pace to complete the first order in time, we’re already behind on the second order! PiQ looks ahead and keeps you alert.
- There are 40 production days left to complete the second order.
- As of now, there 158,115 to produce between now and then (58,115 to fill the first order, and 100,000 to fill the second order.)
- We need nearly 4,000 parts a day, starting now, to make the order. However…
- We would need to operate the machine at 101% utilization. This means we need to add more production hours (overtime or weekends) or add another workstation to the production of this part to be on time.
Lastly, we can look at the production graph for a view of our daily production rate:

- Mouse over any date (in the live environment) to see the count for that day.
- The average is also shown in your information panel to the right.
This concludes the First Part Guide. It’s a great place to start to see what PiQ can do for you in short order, but there’s more to learn! Consult the manual for specific information, and please use the Support Forum if you need any additional help.
