
The Parts tab contains your Part Master and Part Alerts.
Part Master is the central database for every part you produce. Part Alerts are used to display messages to your staff on the Dashboard.
Subtabs: Part Master, Part Alerts
Part Master
Table
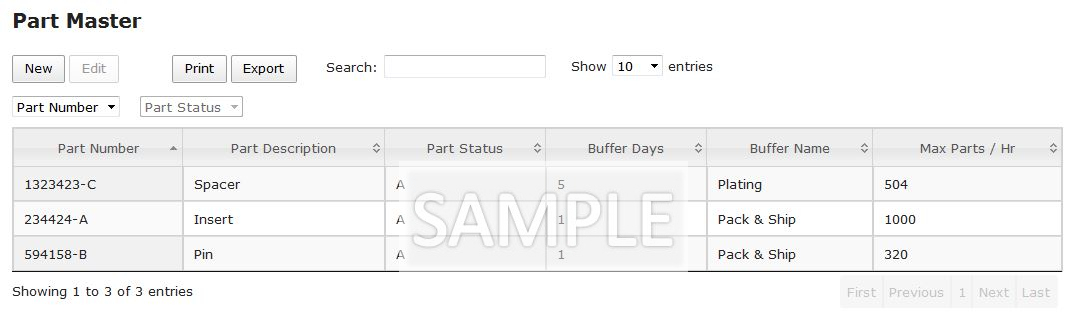
Please see the Interacting with Tables section of this manual to learn how tables work. In this page, we will deal with the specific data in this table.
A brief review of the columns in the Part Master table:
- Part Number: Your internal part number for this item.
- Part Description: Your brief description of the part.
- Part Status: Active or Inactive.
- Buffer Days: The number of days you wish to place between completion of production and the Order Due Date.
- Buffer Name: A description of the added Buffer days.
- Max Parts per Hour: The maximum parts per hour that can be produced across all workstations.
Let’s move on to your interaction with the table:
- To create a new Part:
- Click the “New” button, then follow the Form instructions below.
- To edit an existing Part:
- Select the row you wish to edit, then click the “Edit” button. Follow the Form instructions below.
Now we’ll look at each button action individually:
Add a New Part
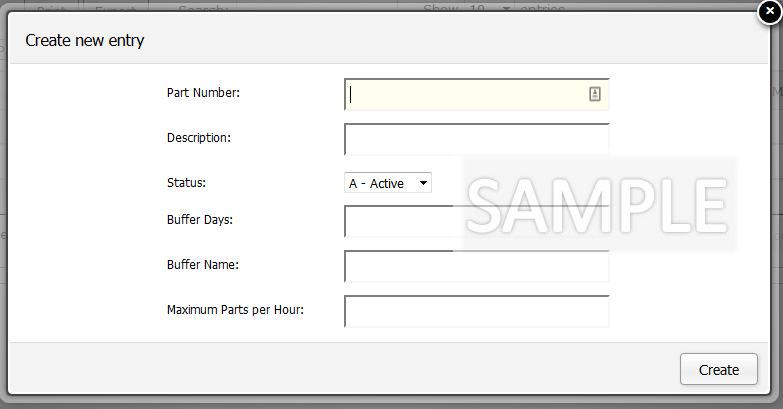
This is the Create new entry form to add a New Part to the system.
- Part Number: Enter your Internal Part Number for this part.
- Part Description: Enter a brief description of the part.
- Part Status: Set the new part to Active status.
- Buffer Days: Add any number of days you wish to place between completion of production and the Order Due Date.
- By default, PiQ’s “Work Days Remaining” schedules you to complete production the day before the order is due, and the day count does not count today.
- A standard Buffer Days number would account for how much time you need to pack and ship the order so it arrives on the Order Due Date.
- Another Buffer Days example: Let’s say you need to send parts out for secondary operations after you have completed production. If the secondary operation require 5 days at your supplier, enter 5 buffer days. This will assure that you have completed your production in time to get the parts through secondary operations before shipping.
- Buffer Name: Enter a brief description to describe the added Buffer Days.
- Max Parts per Hour: Enter the number of parts that can be produced per hour when all workstations are producing.
- It is your choice how you calculate this number, however, it is suggested that you use the 100% maximum possible Parts per Hour.
- If the part is being produced at more than one workstation, enter the sum of all workstations operating at 100%.
- This number is used to calculate your Utilization in the Speedometer Graphs. The system uses your Parts per Hour figures along with the number of hours the facility is open to produce, multiplied by the number of production days between now and the due date to calculate the required Utilization to complete production in time to fill the order.
Once you have completed entering the data for this Part, click “Create” and you’re all done! You will be returned to the table view, and your new line item will be momentarily highlighted in the table.
To cancel the Entry and make no changes, click the “X” at the top right corner of the window, or hit “ESC” on your keyboard.
Edit an Existing Part.
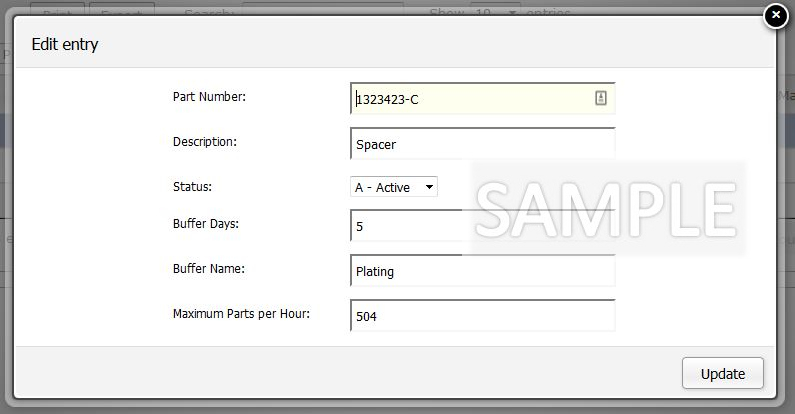
This is the Edit Entry form to edit an Existing Part in the Part Master. For a description of each field, read the Add a New Production Entry text above.
- To begin an Edit on an Existing Part, first you must click on the table row you wish to edit. Once a row is highlighted, the Edit button will become active.
- The form will automatically populate with all of the information from the row you selected.
- Part Number: A part number can be changed, however, note that all of your history for that part number will now reflect the new Part Number. If there is any revision to the part, you may wish to create a new part to differentiate the versions in your history.
- Part Description: You may change how you describe the part at any time.
- Part Status: If a part is obsolete, you may change it to “Inactive” to prevent it’s use in new transactions. All history will be preserved.
- Buffer Days: Any changes to the Buffer Days can be made at any time.
- Buffer Name: The description of Buffer Days can be changed at any time.
- Max Parts per Hour: Edit this entry any time there is a change in your Maximum Parts per Hour (such as when another workstation is added or removed, or the cycle time of the workstation is altered.
- After you have completed your edit, click “Update” to complete the edit. You will be returned to the table view, and your edited line item will be momentarily highlighted
in the table. - To cancel the Edit and make no changes, click the “X” at the top right corner of the window, or hit “ESC” on your keyboard.
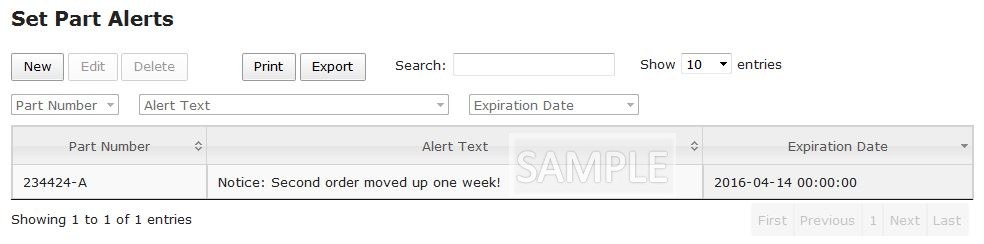
Part Alerts
Table
Use Part Alerts to add urgent information to your Dashboard. Part Alerts show up in red text just below the selection table in the Dashboard Header. This is useful to alert your staff if something changes that has affected lead time or to bring their focus to an issue regarding production.
Please see the Tables section on the General tab of this manual to learn how to interact with the tables. In this page, we will deal with the specific data in this table.
A brief review of the columns in the Part Alerts table:
- Part Number: Your internal part number for this item.
- Alert Text: The text you wish to display when this part is viewed in the Dashboard.
- Expiration Date: The date the Alert will expire and no longer display.
Let’s move on to your interaction with the table:
- To create a new Part Alert:
- Click the “New” button, then follow the Form instructions below.
- To edit an existing Part Alert:
- Select the row you wish to edit, then click the “Edit” button. Follow the Form instructions below.
- To delete an existing Part Alert:
- Select the row you wish to delete, then click the “Delete” button. Follow the Form instructions below.
Now we’ll look at each button action individually:
Add a New Part Alert
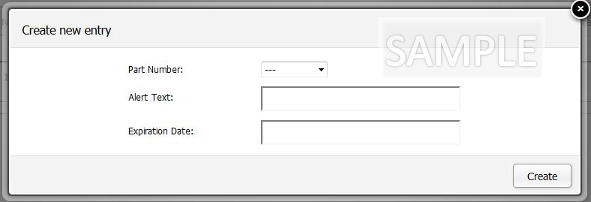
This is the Create new entry form to add a New Part Alert to the system.
- Part Number: Select your internal part number to assign an Alert.
- Alert Text: Enter the text you wish to display on the Dashboard when this part is viewed.
- Expiration Date: Select a date that you wish for the Alert to expire. It will no longer display after this date.
Once you have completed entering the data for this Part Alert, click “Create” and you’re all done! You will be returned to the table view, and your new line item will be momentarily highlighted in the table.
To cancel the Entry and make no changes, click the “X” at the top right corner of the window, or hit “ESC” on your keyboard.
Edit an Existing Part Alert.

This is the Edit Entry form to edit an Existing Part Alert. For a description of each field, read the Add a New Production Entry text above.
- To begin an Edit on an Existing Part, first you must click on the table row you wish to edit. Once a row is highlighted, the Edit button will become active.
- The form will automatically populate with all of the information from the row you selected.
- After you have completed your edit, click “Update” to complete the edit. You will be returned to the table view, and your edited line item will be momentarily highlighted
in the table. - To cancel the Edit and make no changes, click the “X” at the top right corner of the window, or hit “ESC” on your keyboard.
Delete a Part Alert
To Delete a Part Alert, you must first click on the table row you wish to Delete. Once a row is highlighted, the Delete button will become active.
There is no need to delete a Part Alert if you used an expiration date, it will no longer display after that date. It may be deleted if you decide you no longer need it to display, or you could simply change the expiration date if you wish to retain the record.
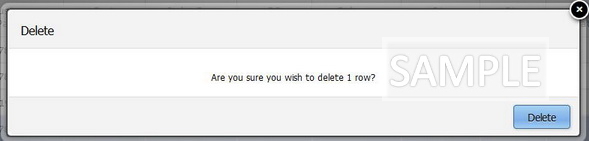
The Delete dialog will appear to confirm that you wish to delete this row. Click the “Delete” button and you will be returned to the table. The row no longer exists.
- To cancel the deletion and leave the record in the table, click the “X” at the top right corner of the window, or hit “ESC” on your keyboard.
